Copyright © 2011-2024, Paul Scrivens-Smith

Copyright © 2011-2024, Paul Scrivens-Smith

All rights reserved. This work may not be reproduced, in whole or in part, without the prior written permission of the creator.

Wednesday 22 May 2013

Re-based the Christian Spanish too

Following on from the recent re-basing exercise with the Berbers I have now done the same with the Christian Spanish.

I'm very happy with the result and I'm sure they now match in much better with those of regular opponents Tom and James.

Here are a whole load of images, all the figures are from the Perry Miniatures First Crusade range.

Commanders

First unit of Cabbaleros

Second unit of Cabbaleros

Third unit of Caballeros

Unit of Jinetes

Unit of Peones

Unit of Peons

Unit of Mercenary Spearmen

Unit of Ballesteros

Unit of skirmishers

Cavalry casualty markers

Infantry casualty markers

The entire force


Burma Bolt Action with Lee

Tonight I gave Lee his first game of Bolt Action using my British and Japanese for the Burma Campaign. We both used pretty much identical forces of:

  • One 2nd Lieutenant with one man
  • One Light Mortar
  • One Medium Machine Gun
  • Three sections of ten men with a SMG and a LMG

The British had an Artillery Forward Observer and the  Japanese had a Medic.

We threw and would be playing the Envelopment mission with Lee using the British and being the attacker. Things did not go well for the British from the start when Lee rolled his preliminary bombardment and threw a one.

Things did get better though, the Artillery Forward Observer landed his barrage between two Japanese squads and threw a six for one of them, thew were soon reduced below half strength and were removed due to a failed moral check.

I had to commit a reserve squad to fill the gap. Lee was making a feint thrust on his right, but concentrating on the left so that I could not move to strengthen that area, and having lost a whole squad early doors to the artillery barrage was spread quite thin.

Eventually, I had killed the light mortar and the section on Lees left, but the attack on his right went very well, sweeping away all my troops on that side. We rolled and there would be a crucial seventh turn, allowing Lee to move one section off and move two more into my deployment zone.

A dismal performance for the Japanese, I had scored only four points to Lees thirteen!


Tuesday 21 May 2013

Bunkers for the Japanese

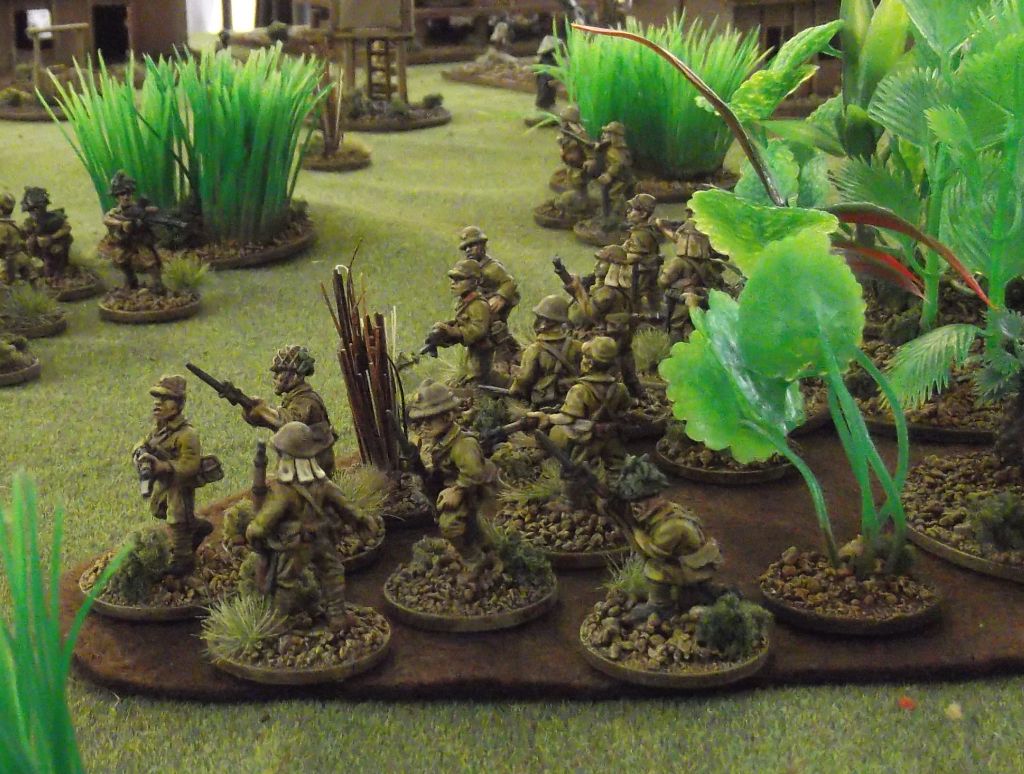
During our try-out games for Partizan, it became clear that the Japanese were being shot to pieces, this is compounded some what by our regular Japanese player, James, who plays every game as if he were a Viking Warlord and must charge the enemy at the earliest opportunity and engage with cold steel.

I decided it was time to have something for the Japanese to build a defensive line on, so I have put together a couple of bunkers for the machine guns and a few lengths of revetments for the riflemen to shelter behind. It will make them much less likely to get shot to pieces and if he has a trench line to defend, James may not rush off to engage the British on turn one with the bayonets.

The construction of the bunkers is a foam-core base with the bunker made from blue high density polystyrene, with the roof made of more foam-core. The timbers are made from coffee-stirrers. The whole lot was coated with Vallejo Pumice Gel and then a mix of coarse sand was applied to the base and the roof. The whole lot was painted in Vallejo US Field Drab, dry-brushed with Vallejo Dark Sand and washed with Vallejo Sepia Wash (I was quite near the end of the jar so these have come out quite dark). I stuck a few twigs on and they were finished off with Woodland Scenics clump foliage and Mini-natur tufts.

Two bunkers
Rear view of bunker


Manned with Type 92 MMG
The revetments are made in a similar way, I stuck blue foam to tongue-depressors and then backed with coffee-stirrer planking. The uprights are bamboo skewers. They were painted and finished off like the bunkers.

A few revetments

Rear view of a long section

Rear view of a short section
Afraid there was not a lot of light this morning when I took these, so the pictures are a little dark.

As for the rules, there is nothing in Bolt Action for trenches and bunkers, so I think I'll count the bunkers as if they were an house, so +2 to hit for concealment and only damage on a 6+ and the revetments as a +1 to hit for concealment and only damage on a 6+.

Saturday 18 May 2013

Re-painted and tittivated the Berber bases

The re-based Berbers

First unit of Spear and Bow
I've speed painted a handful of units of Berbers for our El Cid games these past few months and had done the bases on them much like those on my Christian Spanish. During the large Siege of Valencia game we put on at Retford, it was again clear that they were nowhere near like those of my regular gaming opponents, James and Tom, so I decided that I would re-base mine to be more of a match.

The original bases are initially over-painted with Daler-Rowney Yellow Ocher and when that is dry are given a light dry-brush of Yellow-Ocher and Vallejo Ivory and then a dry-brush of Ivory. Then, once that is dried small pieces of cork bark, Woodland Scenics clump foliage, and Mini-natur tufts are stuck on. The cork bark is dry-brushed with Ivory and then small patches of Games Workshop static-grass are added. 


Second unit of Spear and Bow
Third unit of Spear and Bow
I did like the look of the old bases, but I'm happy how these are turned out and they'll look much more in-keeping with my regular opponents figures now.

I have now made a start on doing the Christian Spanish bases the same, although that will be a much bigger proposition as there is at least four times this amount.


Berber Cavalry


Saga - for a change

Jomsvikings
I've not played Saga for ages so Phil and I organised a game for Wednesday. Nick became available to so I decided to set up a Feast for Crows.

Nick and Phil had not been to the new venue for the club, and after some introductions we got down to playing. Both Nick and I were using Vikings. I had Warlord, two units of Hirdmen, a unit of Berserkers and a unit of Bondi. Nick had a Warlord, one unit of Hidmen, a unit of Berserkers and two units of Bondi, one fielded at 4, the other at 12. Phil used his Jomsvikings with his Warlord, two units of Hearthguard and two units of Warriors.

Nicks Vikings
We set up in our respective corners, and all being Vikings initially rushed towards a huge melee in the centre. I lost a unit of Bersekers and a unit of Hirdmen taking out the large unit of Nicks Bondi - not a good exchange. I decided then to back off a bit and let Phil and Nich go at it. This was a pretty bad mistake on my part as I caused hardly any kills while Phil and Nick went at it hammer and tongs.

At the end of the game, Phil had killed Nicks Warlord and thus overtaken him in kill points, I was a lackluster 3rd place.

We spent so long chatting and playing I only got a few images, these are some of the best of them.

My Vikings


Friday 17 May 2013

Partizan run through

Yesterday evening, Matt, Steve, Mark, James and myself had another try out of the game that we'll be playing at Partizan in a couple of weeks. Again it would be two platoons of British forces attacking a Japanese held village. We used the modifications we had used previously to make Bolt Action less predictable, but this time I had made a load of cards for the random events. We also had two 'Story' dice in the bag, but I'd now consider having even more of those.
Matt and Steve each played a British platoon, while Mark and James shared duties with the Japanese. As you can see from the photos's I've made even more jungle terrain so the table is even closer. The game progressed well, James did his usual trick of advancing his Japanese to meet the British and soon a couple of his sections were badly shot up for little gain, but a well timed Banzai charge cleared out a section of British, James really does like to get at least one bayonet charge in each game, it really brings the Dark Ages out in him. 
Matt broke all the rules of fire discipline with the Sherman, trying to fire over his own infantry, and when I vetoed that firing into a section of jungle that was occupied by both Japanese and British troops. As we were trying things out and had a lot of stuff on the table, we did not fight to a conclusion, but the Japanese were quite badly depleted, although reinforcements had turned up. Apart from losing a single section of infantry, Steve had manouvered around the flank of the Japanese position and were poised to take the village.
I'm pretty happy now with how things will pan out at Partizan.

I'm now making a few bunkers for the Japanese to hole up in, maybe this will persuade James that a Banzai Charge is not the be-all and end-all of Japanese tactics.


Thursday 16 May 2013

A couple of sections of Gurkha

Over the past few days I've finished off sixteen Gurkha for my Burma 1945 project. Two sections of eight Gurkha with a SMG (Sten or Thompson), six SMLE Rifles and a BREN gun.

Lovely figures full of character, from The Assault Group and really easy to paint. I did them as follows:


  • Clean up figures and stick on 25mm round MDF bases
  • Prime them with Halfords white primer (I usually use grey but had run out)
  • An all over wash of Vallejo Beige Brown, Vallejo Glaze Medium and water.

I then rough out a base coat as follows:

  • Vallejo Gunship Green: Shirts, trousers, some hats, some webbing, some gaiters, some packs, some water bottles
  • Vallejo Khaki:  Rifle slings, some hats, some webbing, some gaiters, some packs, some water bottles.
  • Vallejo Chestnut Brown: Rifle stocks, entrenching tool handles, bayonet handles, some boots.
  • Vallejo Black: Bayonets, Rifle fittings, some boots.
  • Vallejo Saddle Brown & Vallejo US Tan Earth : Exposed flesh.

Once the figure is base coated I give the figure a wash of Vallejo Sepia Wash. Once dry I apply the highlights as follows:

  • Gunship Green areas: Highlight with Gunship Green then highlight again with a mix of Gunship Green & Dark Sand
  • Khaki areas: Highlight with Khahi then highlight again with a mix of Khaki & Dark Sand
  • Chestnut Brown areas: Highlight with Chestnut Brown then highlight again with a mix of Chestnut Brown & Dark Sand
  • Black areas: Highlight with Black Grey for the boots 
  • Black areas: Highlight with a mix of Gunmetal Grey and Black for the bayonets and rifle fittings, then bayonets are then further highlighted in Gunmetal Grey
  • Exposed flesh highlighted with US Tan Earth then highlighted again with Tan Yellow.

Once the highlights are done then the detail is picked out with Windsor and Newton Peat Brown ink.

The bases are then covered in PVA glue and dipped in a coarse sand mix that is painted Vallejo US Field Drab, highlighted with Vallejo Dark Sand and then washed with Vallejo Sepia Wash then decorated with tufts and scatter.


Here are a load of close-ups: